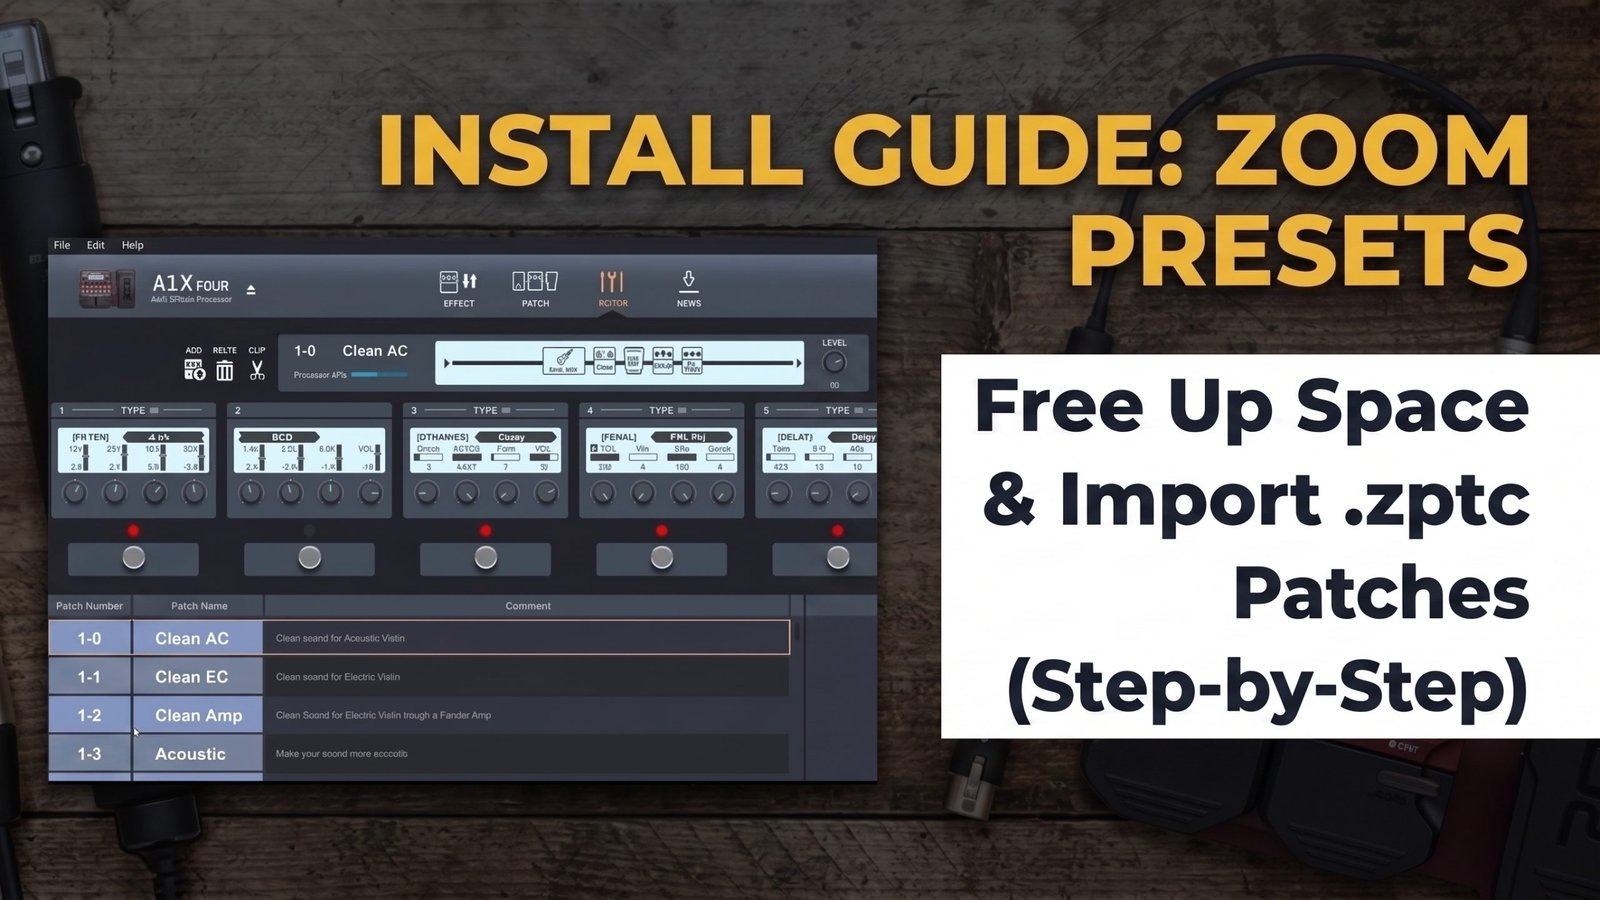
A complete guide to managing pedal memory, loading custom presets via Zoom Guitar Lab, and fine-tuning your acoustic or stringed instrument tone.
Congratulations on picking up the custom preset pack! Whether you play acoustic violin, electric violin, viola, cello, or guitar, these presets cover everything from warm acoustic resonance to modern ambient textures.
If you’re wondering how to load your new .zptc or .zm1x patch files or how to free up memory space on your device, this guide has got you covered.
💡 Universal Compatibility (Zoom A1 Four & A1X Four)
This installation method and setup process are 100% identical whether you are using the Zoom A1 Four or the Zoom A1X Four (with expression pedal).
Looking to explore custom violin patches designed specifically for your hardware? Check out our dedicated preset packs:
📺 Step-by-Step Video Tutorial
Prefer following along visually? Watch the full video walkthrough below:
📋 Prerequisites & Hardware Requirements
Before installing your presets, ensure you have the following ready:
- Zoom A1 Four or A1X Four Pedal
- Computer (Windows or macOS)
- External Power Supply (Power Bank or AC Adapter)
- Data-Capable Micro-USB Cable (Must be a data transfer cable, not a charging-only cable)
- Zoom Guitar Lab Software (Free download from Zoom’s website)
🛠️ Step-by-Step Installation Guide
Step 1: Download & Install Zoom Guitar Lab
You cannot install .zptc patch files directly through the hardware pedal menu. Download and install the free official software from Zoom’s website on your computer.
Step 2: Connect Your Hardware
- Power on your pedal using an external power source first.
- Connect the USB data cable from your pedal to your computer.
- Verify that the pedal screen reads “PC Mode”.
Step 3: Clear Room & Check Required Effects
If you encounter a “Memory Full” prompt or cannot add new patches, manage the memory via the software:
- Open Zoom Guitar Lab. Confirm the top icon highlights in blue.
- Navigate to the Effect Pool panel on the right side.
- Free Up Memory: Right-click unused amp models or heavy factory effects you don’t use and select “Delete from device”. Keep the Used Memory gauge below 80–90%.
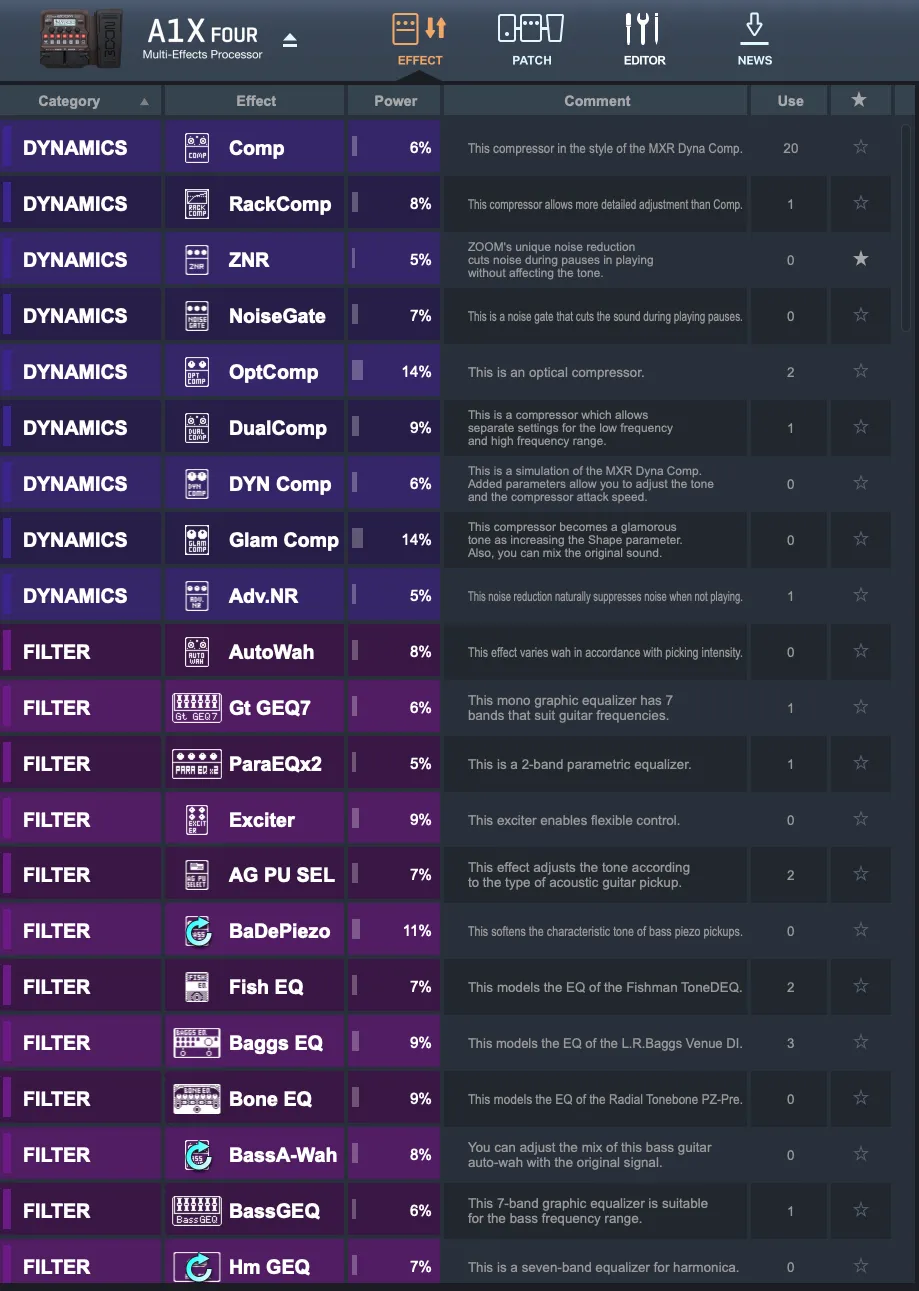
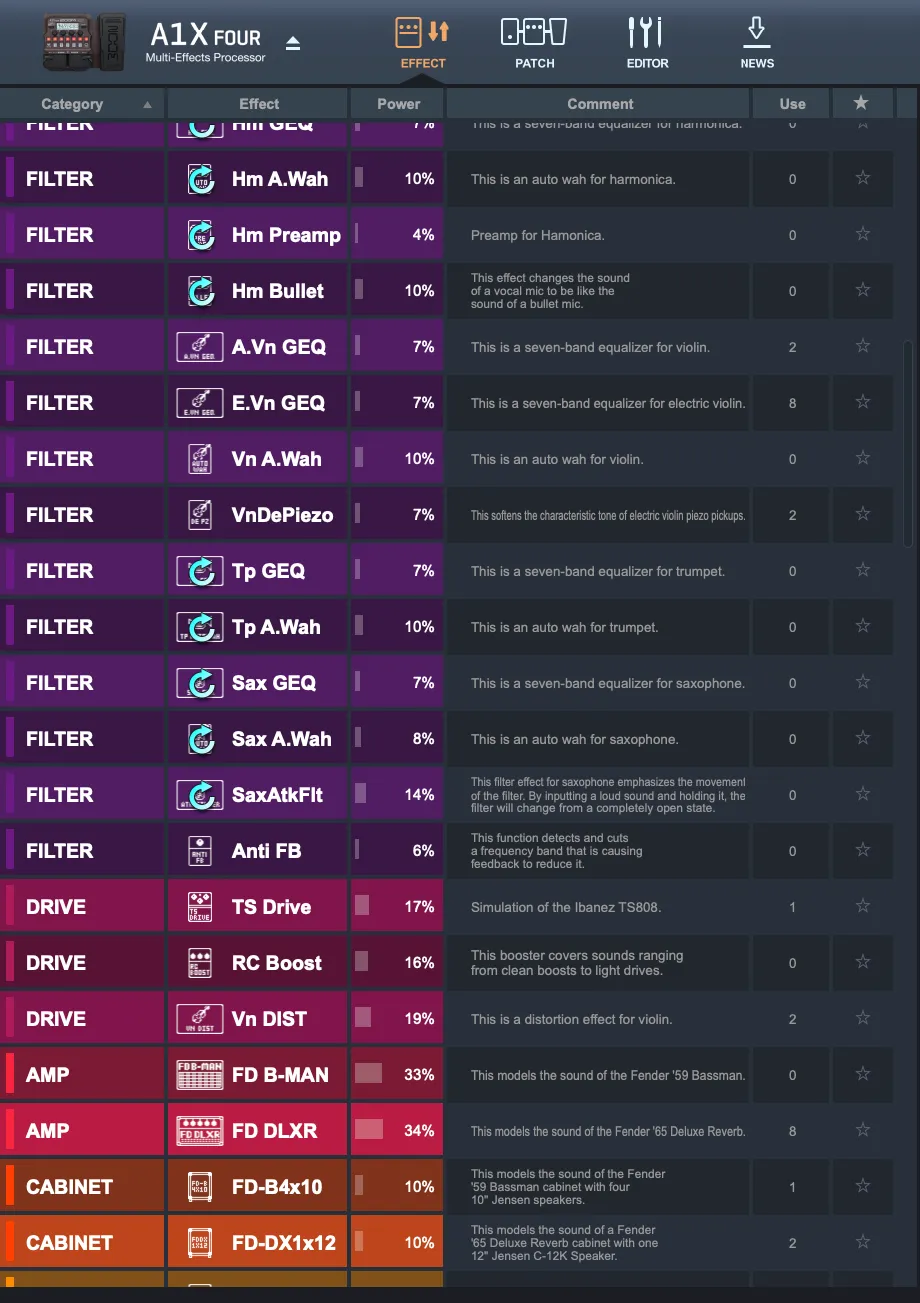
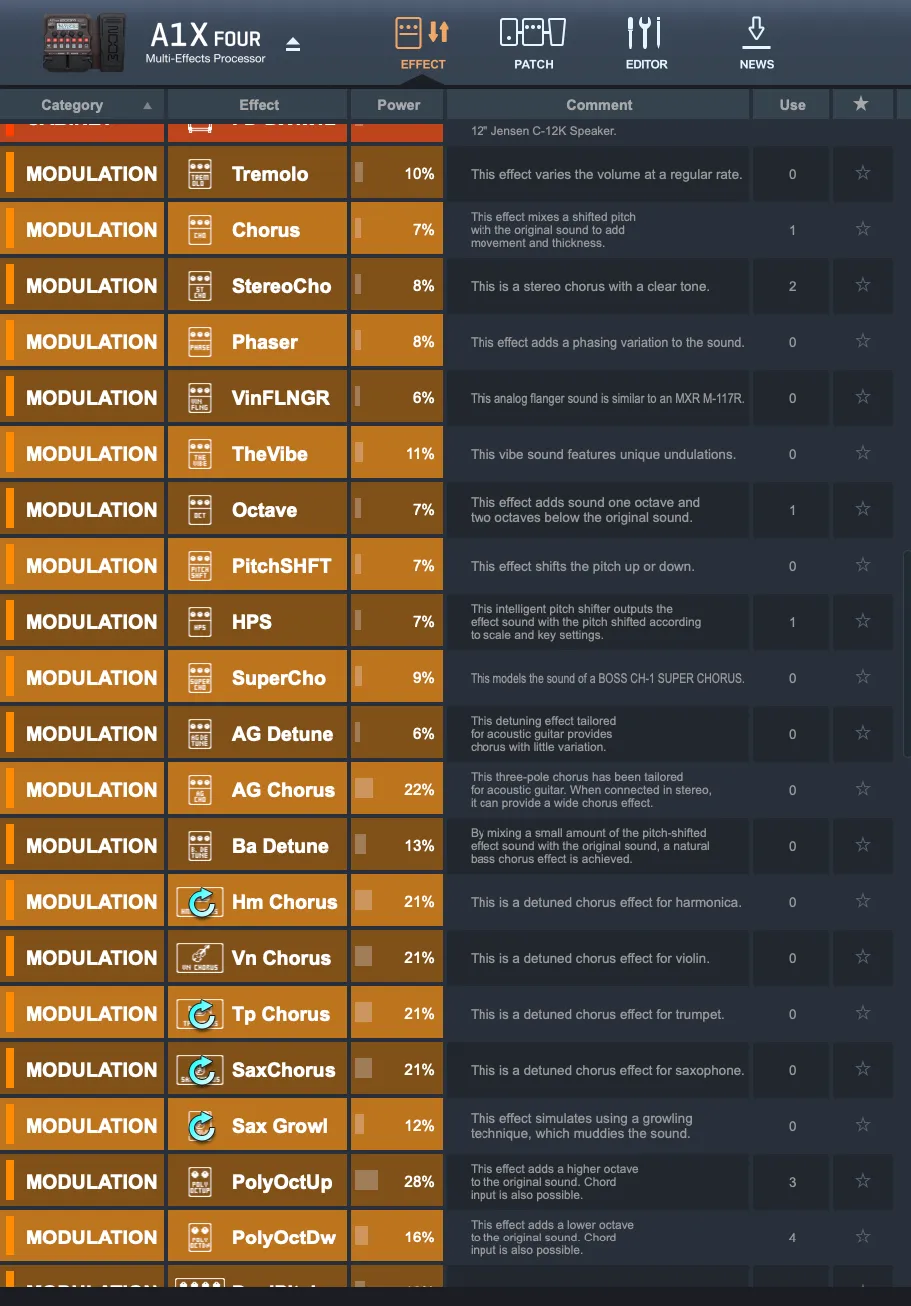
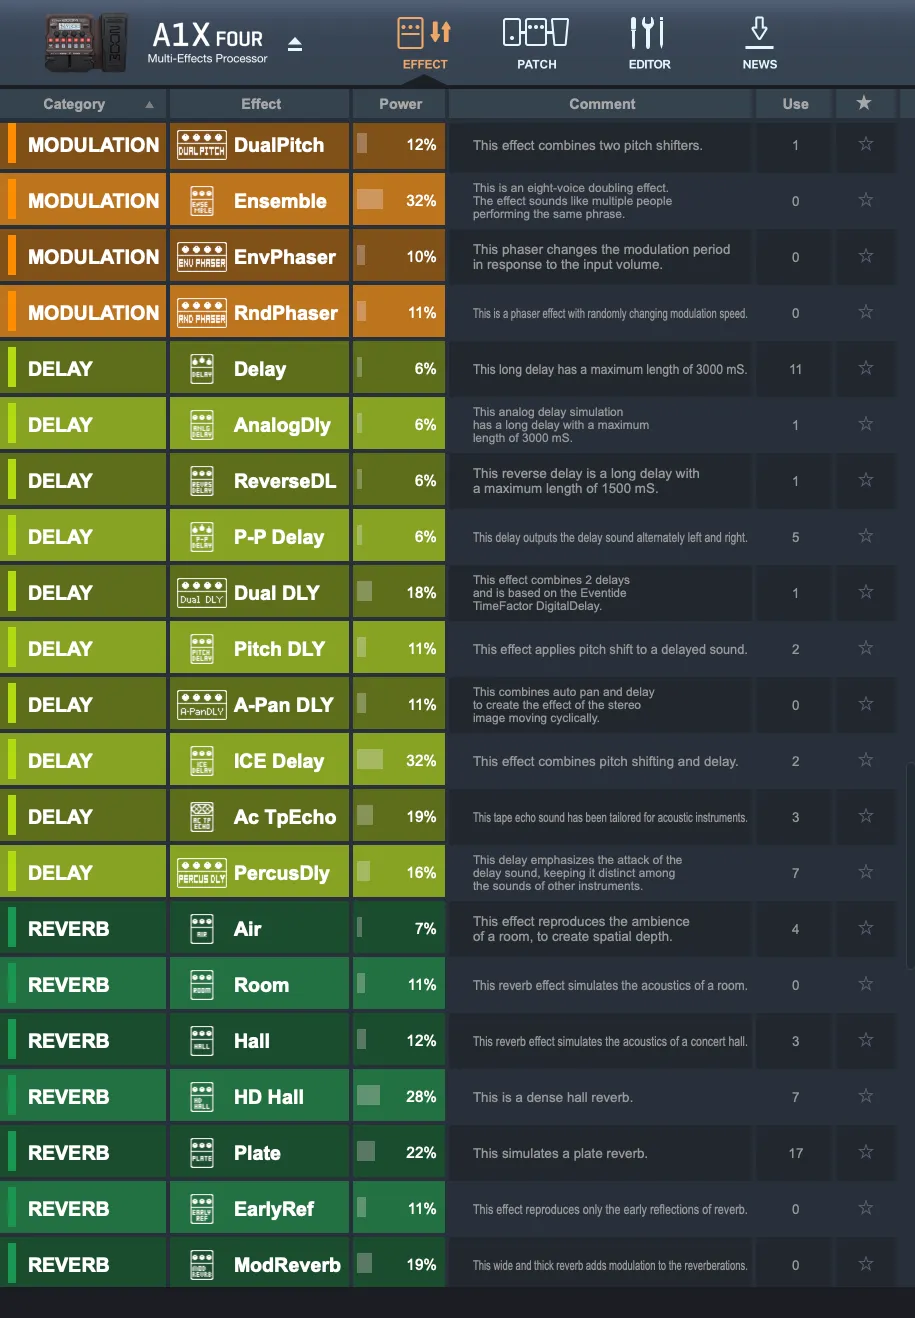
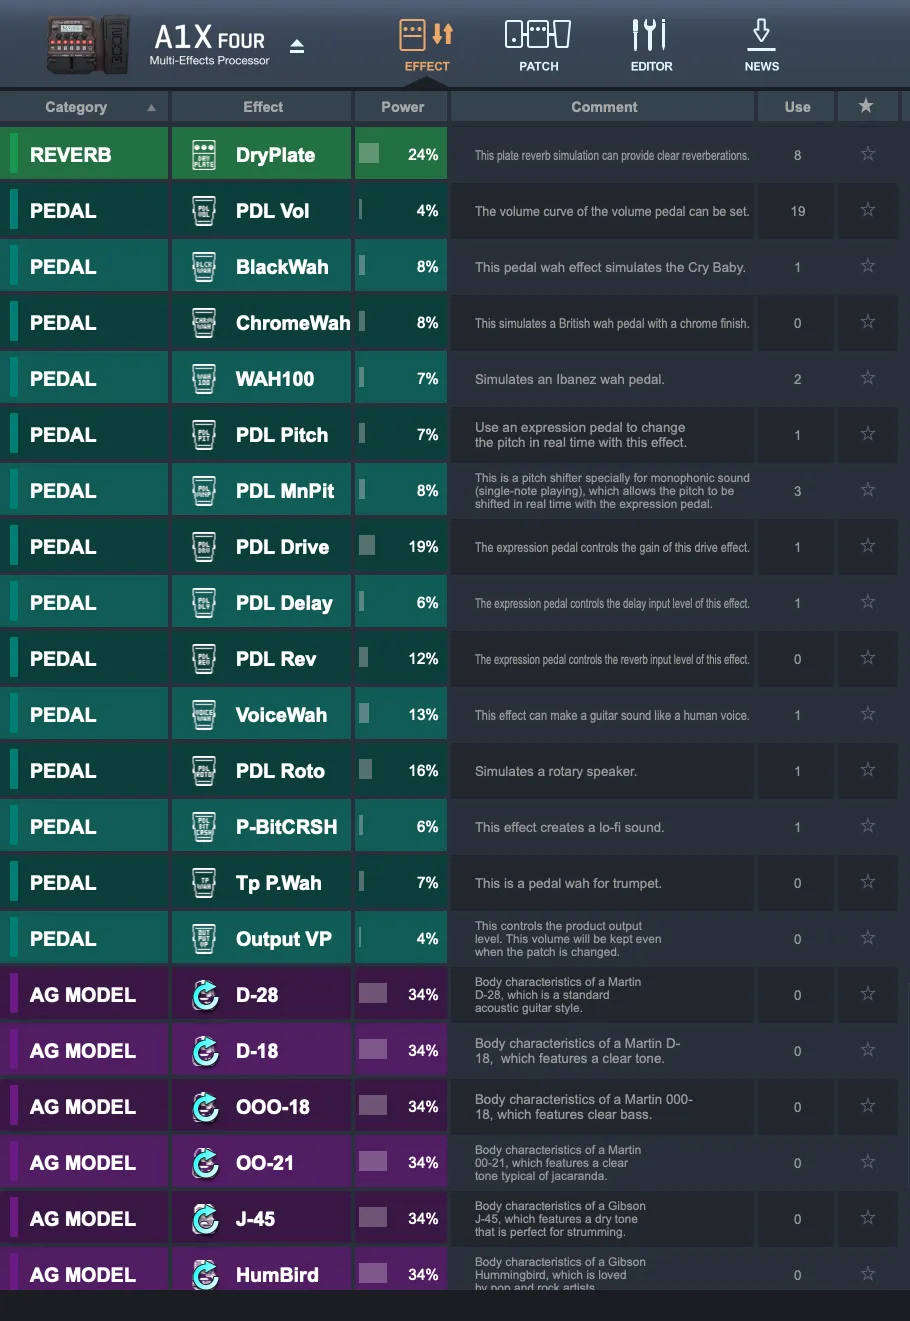
- Install Missing Effects: Ensure all yellow/unloaded required effects from your downloaded pack are installed into your pedal’s Effect Pool. Cross-check your pedal’s loaded effects with the reference list screenshots below.
Step 4: Backup Your Patches
Click on the Patch tab in Guitar Lab, select your existing patches (Ctrl + A or Cmd + A), and drag them into a computer folder as a backup.
Step 5: Import the Presets
Select your unzipped preset files (.zptc format) and drag-and-drop them directly into the Patch list on the left panel of Guitar Lab.
🖼️ Required Effects Reference List
Ensure these exact effects are loaded in your Zoom hardware via Guitar Lab for all custom presets to sound correctly:
❓ Troubleshooting Quick Guide
| Problem | Likely Cause | Solution |
|---|---|---|
| Pedal not detected / Red Icon | Faulty or charge-only USB cable | Use a dedicated USB data cable. Ensure screen displays “PC Mode”. |
| “Memory Full” Error | Pedal storage limit reached | Delete unused amp models/effects from the Effect Pool in Guitar Lab. |
| Preset has no sound | Missing required effect modules | Install all required effects listed in the product download reference images. |


